Beginner's Guide to Violin Anatomy: How Parts Affect Tuning
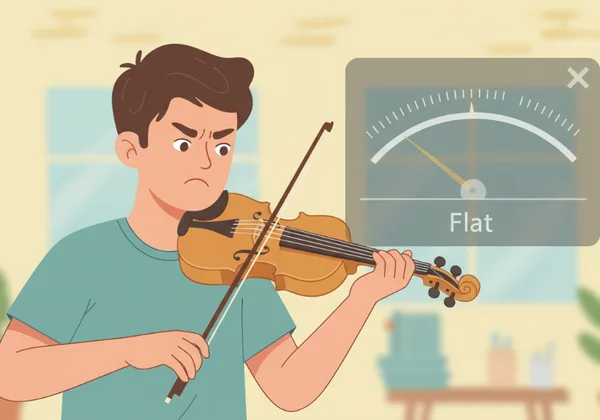
Every new violinist faces the same challenge: you pick up your instrument, draw the bow, and instead of a sweet melody, you hear a sour, flat note. This frustration can make anyone want to give up. Why won't your violin stay in tune? Most of the time, the problem isn't your ears or your talent. It is simply a matter of understanding the physical parts of your instrument.
Learning how to maintain your violin is just as important as learning how to play it. Before you can achieve a professional sound, you must understand the hardware that creates that sound. This guide walks you through the essential anatomy of the violin and shows how each part affects your pitch. Once you understand the mechanics of your instrument, using a violin tuner becomes much easier and more effective.
In this article, we break down the functions of pegs and fine tuners, the importance of the bridge, and how to keep your setup stable. By the end, you will feel confident enough to use our online tool to get your violin sounding perfect every time you practice.
The Essential Violin Parts for Tuning Success
To tune a violin accurately, you must interact with specific hardware designed to change string tension. If you don't know which part to turn, you risk snapping a string or damaging the wood. There are two main areas where you adjust the pitch: the head of the violin and the tailpiece.
The Pegbox and Violin Pegs: Coarse Adjustment
The pegbox is located at the top of the violin, just below the scroll. This housing holds the four violin pegs. These pegs are responsible for "coarse tuning," which involves making large changes to the pitch. When you install a new string or when a string becomes very loose, the pegs are your primary tool.
Violin pegs work on the principle of friction. They are tapered pieces of wood that fit into holes in the pegbox. Unlike a guitar, which has geared tuners, a violin peg stays in place because it is pressed tightly into the hole. If you simply turn the peg, it might slip back. To prevent this, use the "push and turn" technique—apply gentle pressure inward toward the pegbox as you rotate the peg. For more help with maintenance, see our Fixing Slipping Pegs guide.
When you use our free tuner, you will notice that the pegs move the pitch very quickly. A tiny turn can raise the pitch by a whole note or more. Always be careful during this stage. If the note on the screen is far below the target, use the pegs to get close before switching to finer adjustments.
Fine Tuners: Precision Pitch Control
If the pegs are for "big" changes, the fine tuners are for "small" changes. These are the small metal screws located on the tailpiece, which is the black component near the bottom of the violin where the strings are anchored. Most beginner violins have four fine tuners, one for each string (G, D, A, and E).
Fine tuners offer precision control. Unlike pegs, they adjust pitch in tiny increments—perfect for dialing in the exact note with our online tuner. When the visual needle on the interface is just a little bit to the left or right of the center, the fine tuner is the correct tool to use.
To use them, turn the screw clockwise to make the pitch higher (sharper) or counter-clockwise to make the pitch lower (flatter). Use the pegs only when the string is totally "out" and rely on fine tuners for daily touch-ups. This keeps your tuning process safe and prevents you from over-shooting the correct note.
Violin Setup and Maintenance for Stable Pitch
Even with the best tuning technique, your violin won't stay in tune if the physical setup is incorrect. The violin is a delicate balance of tension and pressure. If one part is out of alignment, the whole instrument will struggle to maintain its pitch.
The Bridge: Why Angle Matters for Intonation
The bridge is the thin piece of maple wood standing between the fingerboard and the tailpiece. It is held in place entirely by the downward pressure of the strings and is not glued down. This makes it one of the most critical parts of violin setup maintenance.
Because the bridge isn't glued, it can move. Every time you tune using the pegs, the strings pull the top of the bridge slightly toward the scroll. Over time, the bridge can start to lean forward. Check your bridge angle weekly. If it is leaning, your violin will sound "off," and the bridge could eventually collapse or warp.
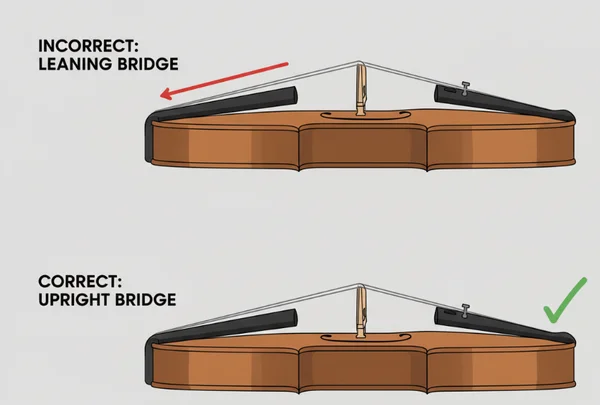
A leaning bridge also affects your intonation. If the bridge moves even a millimeter, the length of the vibrating string changes, meaning the notes won't be in the right place on the fingerboard. Always ensure your bridge stands at a 90-degree angle to the top of the violin. Keeping this consistent makes it much easier to tune your violin because the tension remains even across all four strings.
The Soundpost and Tailpiece: Hidden Factors
Inside the body of the violin, directly under the right foot of the bridge, stands the soundpost. While you cannot reach it easily, its position is vital. It supports the structure and transfers vibrations to the back of the instrument. If the soundpost falls or moves, the violin will lose its "voice" and the tuning will become unstable.
The tailpiece also plays a role. Does your pitch drop seconds after tuning? A loose tailpiece could be the culprit. Check this first if our violin tuner shows instability. If the tailpiece is at the wrong height or the "tailgut" loop is stretching, you will find yourself constantly re-tuning. While these parts usually require a professional luthier to fix, being aware of them helps you understand why your instrument might behave strangely.
Optimizing Your Tuning Routine with Violin Anatomy
Now that you understand the anatomy of your instrument, you can use that knowledge to get professional results. Our online tool provides real-time feedback, but it works best when you know how to respond to that feedback physically.
Step-by-Step: Pegs vs. Fine Tuners on the Interface
When you visit our homepage to start your tuner, the process is simple, but your approach should be strategic. Here is how to combine your knowledge of violin parts with our digital interface:
- Open the Tool: Click "Start Tuner" and allow microphone access.
- Play a String: Pluck your A string clearly.
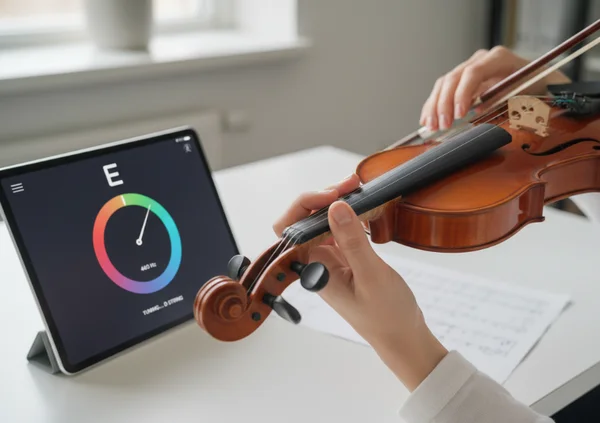
- Check the Visual Feedback: Look at the needle on the screen.
- Scenario A (The Needle is far to the left): This means your string is very flat. Use the violin pegs. Gently push the peg in while turning it away from you. Stop once the needle gets close to the center.
- Scenario B (The Needle is near the center but not green): Use the fine tuners. Turn the screw on the tailpiece slowly until the interface indicates you have reached the perfect pitch.
- Repeat for All Strings: Move to the D, G, and then the E string. Always double-check your A string at the end, as changing the tension on other strings can sometimes shift the first one.
Understanding when to use coarse versus fine adjustments protects your strings from snapping and ensures a faster tuning process.
Putting It All Together: Tune Confidently with Anatomy Knowledge
Understanding your violin’s anatomy transforms tuning from a chore into a simple maintenance task. By mastering the roles of the pegs, fine tuners, and the bridge, you take full control of your sound. A well-maintained violin holds its tune longer—saving you time and frustration during practice.
Keep a close eye on your bridge angle, ensure your pegs are fitted well, and use your fine tuners for those tiny, crucial adjustments. With a bit of practice, you will spend less time troubleshooting your hardware and more time playing the music you love.
Ready to test your hardware? Click here to use our precise Online Violin Tuner and get your instrument ready for your next session.
Frequently Asked Questions About Violin Hardware
Why do my violin pegs keep slipping?
Violin pegs usually slip because of changes in humidity or insufficient pressure. Since they stay in place via friction, the wood can shrink in dry weather, causing them to loosen. Try the "push and turn" method to secure them. If they still slip, you can use "peg drops" or "peg dope" to add friction. Checking your pitch regularly with a digital tool will help you catch slipping pegs before they become a major problem.
How do I tune a violin as a beginner?
The safest method for beginners is to use a visual tuner. Start by plucking the string and watching the needle on the screen. If the note is very low, use the peg. If it is only slightly off, use the fine tuner. Always tune "up" to the note to keep the tension stable. You can follow our full guide and use the free tuner on our homepage for the best results.
What are the notes for tuning a violin (G, D, A, E)?
The four strings of the violin are tuned in perfect fifths. From the thickest (lowest) string to the thinnest (highest), the notes are G, D, A, and E. The A string is typically tuned to a frequency of 440Hz. When you use a violin tuner, the interface will automatically recognize which of these four notes you are trying to reach.
Do I need a fine tuner on every string?
While professional players often only have a fine tuner on the high E string, most beginners benefit from having them on all four strings. This makes the tuning process much easier and more precise, especially when using a digital online tuner. If your violin only has one, a technician can easily add more to your tailpiece to simplify your routine.